¶ Introduction
The Clonezilla can act as a server, including TFTP, DHCP features for PXE boot. When target machines do PXE boot, they can restore the Clonezilla image from the File Server to the target disk automatically without any interaction.
Here is the reference: Run a Clonezilla lite server to do massive deployment from an image via multicast mechanism
¶ Preboot Execution Environment (PXE) Boot Limitation
- The Clonezilla server & clients must be in the same local network for PXE boot
- The Clonezilla server must have an Ethernet port which can be onboard one, or an USB to Ethernet adapter.
- Clonezilla client machine's BIOS must support PXE boot. And, that almost means the client machine must have an onboard Ethernet port.
- The kernel from Clonezilla is not signed. So, have to take care the secure boot of BIOS
¶ Prepare
- Download Clonezilla LiveCD ISO from https://clonezilla.org/downloads.php
Suggest using the "testing releases" which includes the newer kernel to support more devices. Then, create the LiveCD, or flash it as a LiveUSB - The Clonezilla clients (target machines) must enable the PXE boot feature in BIOS and connect the netwrok via the Ethernet port. Here is an example from an ASUS machine:
- Get into ASUS machine's BIOS setting -> Network Stack Configuration
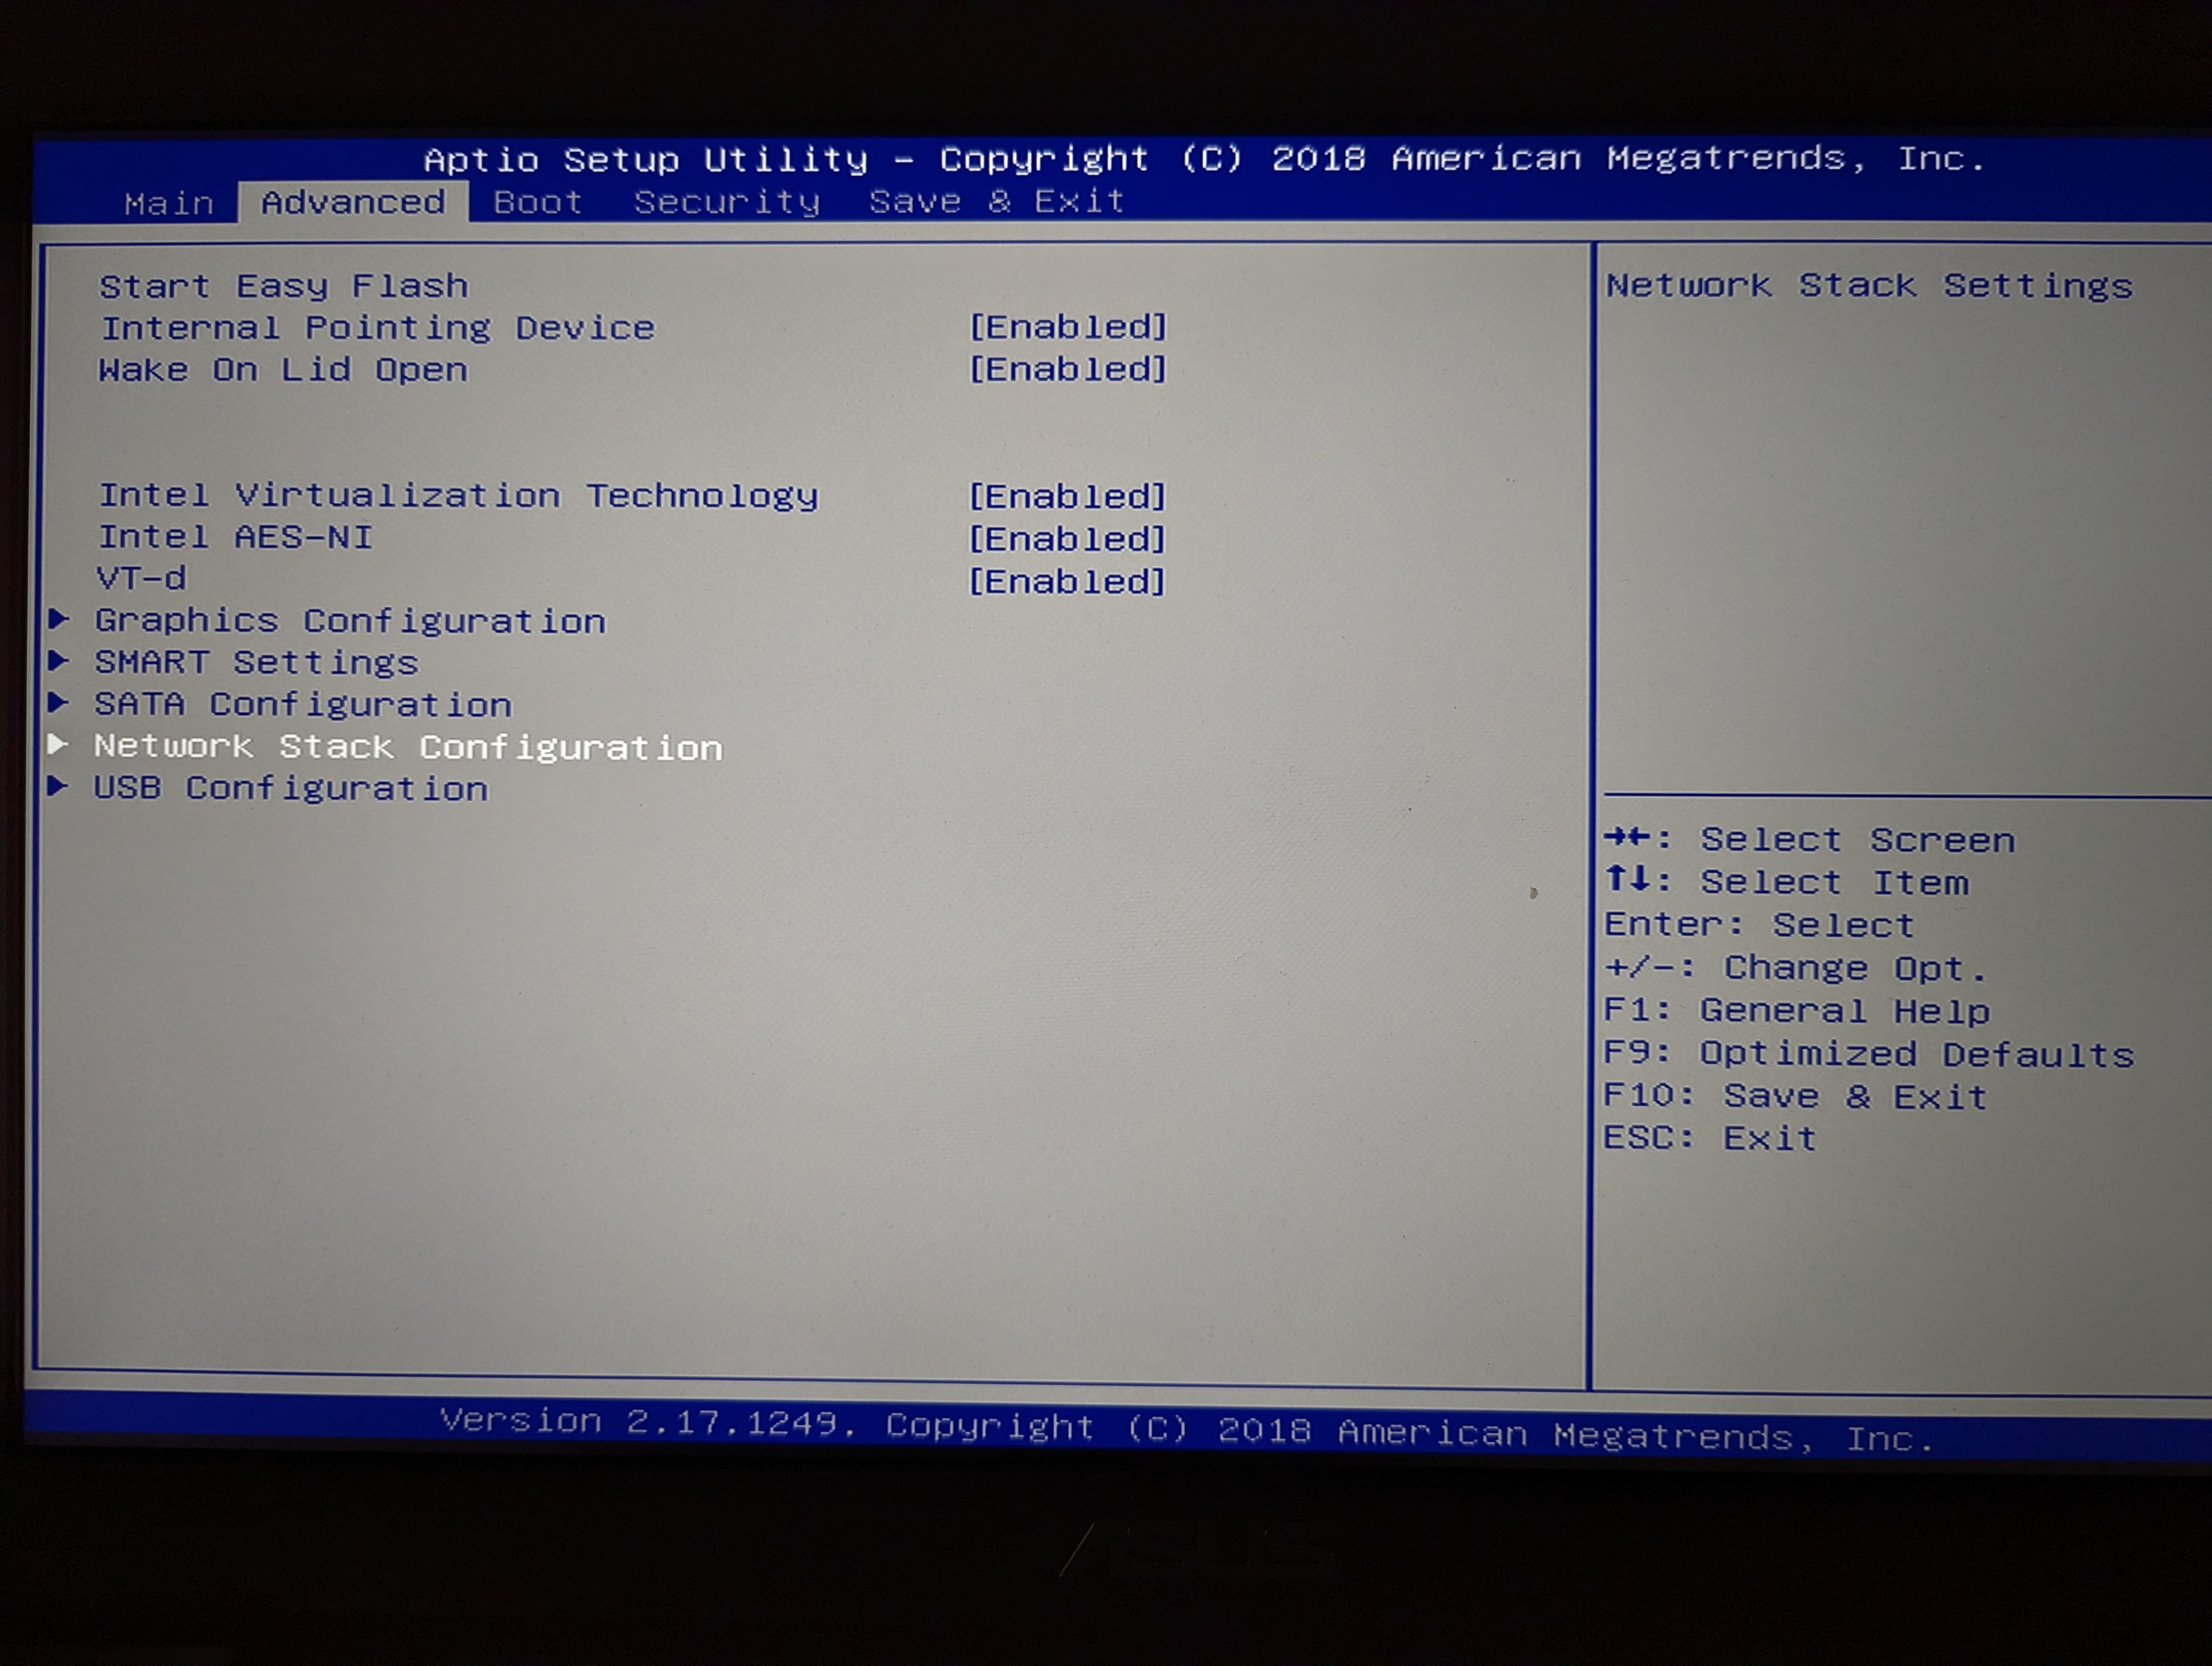
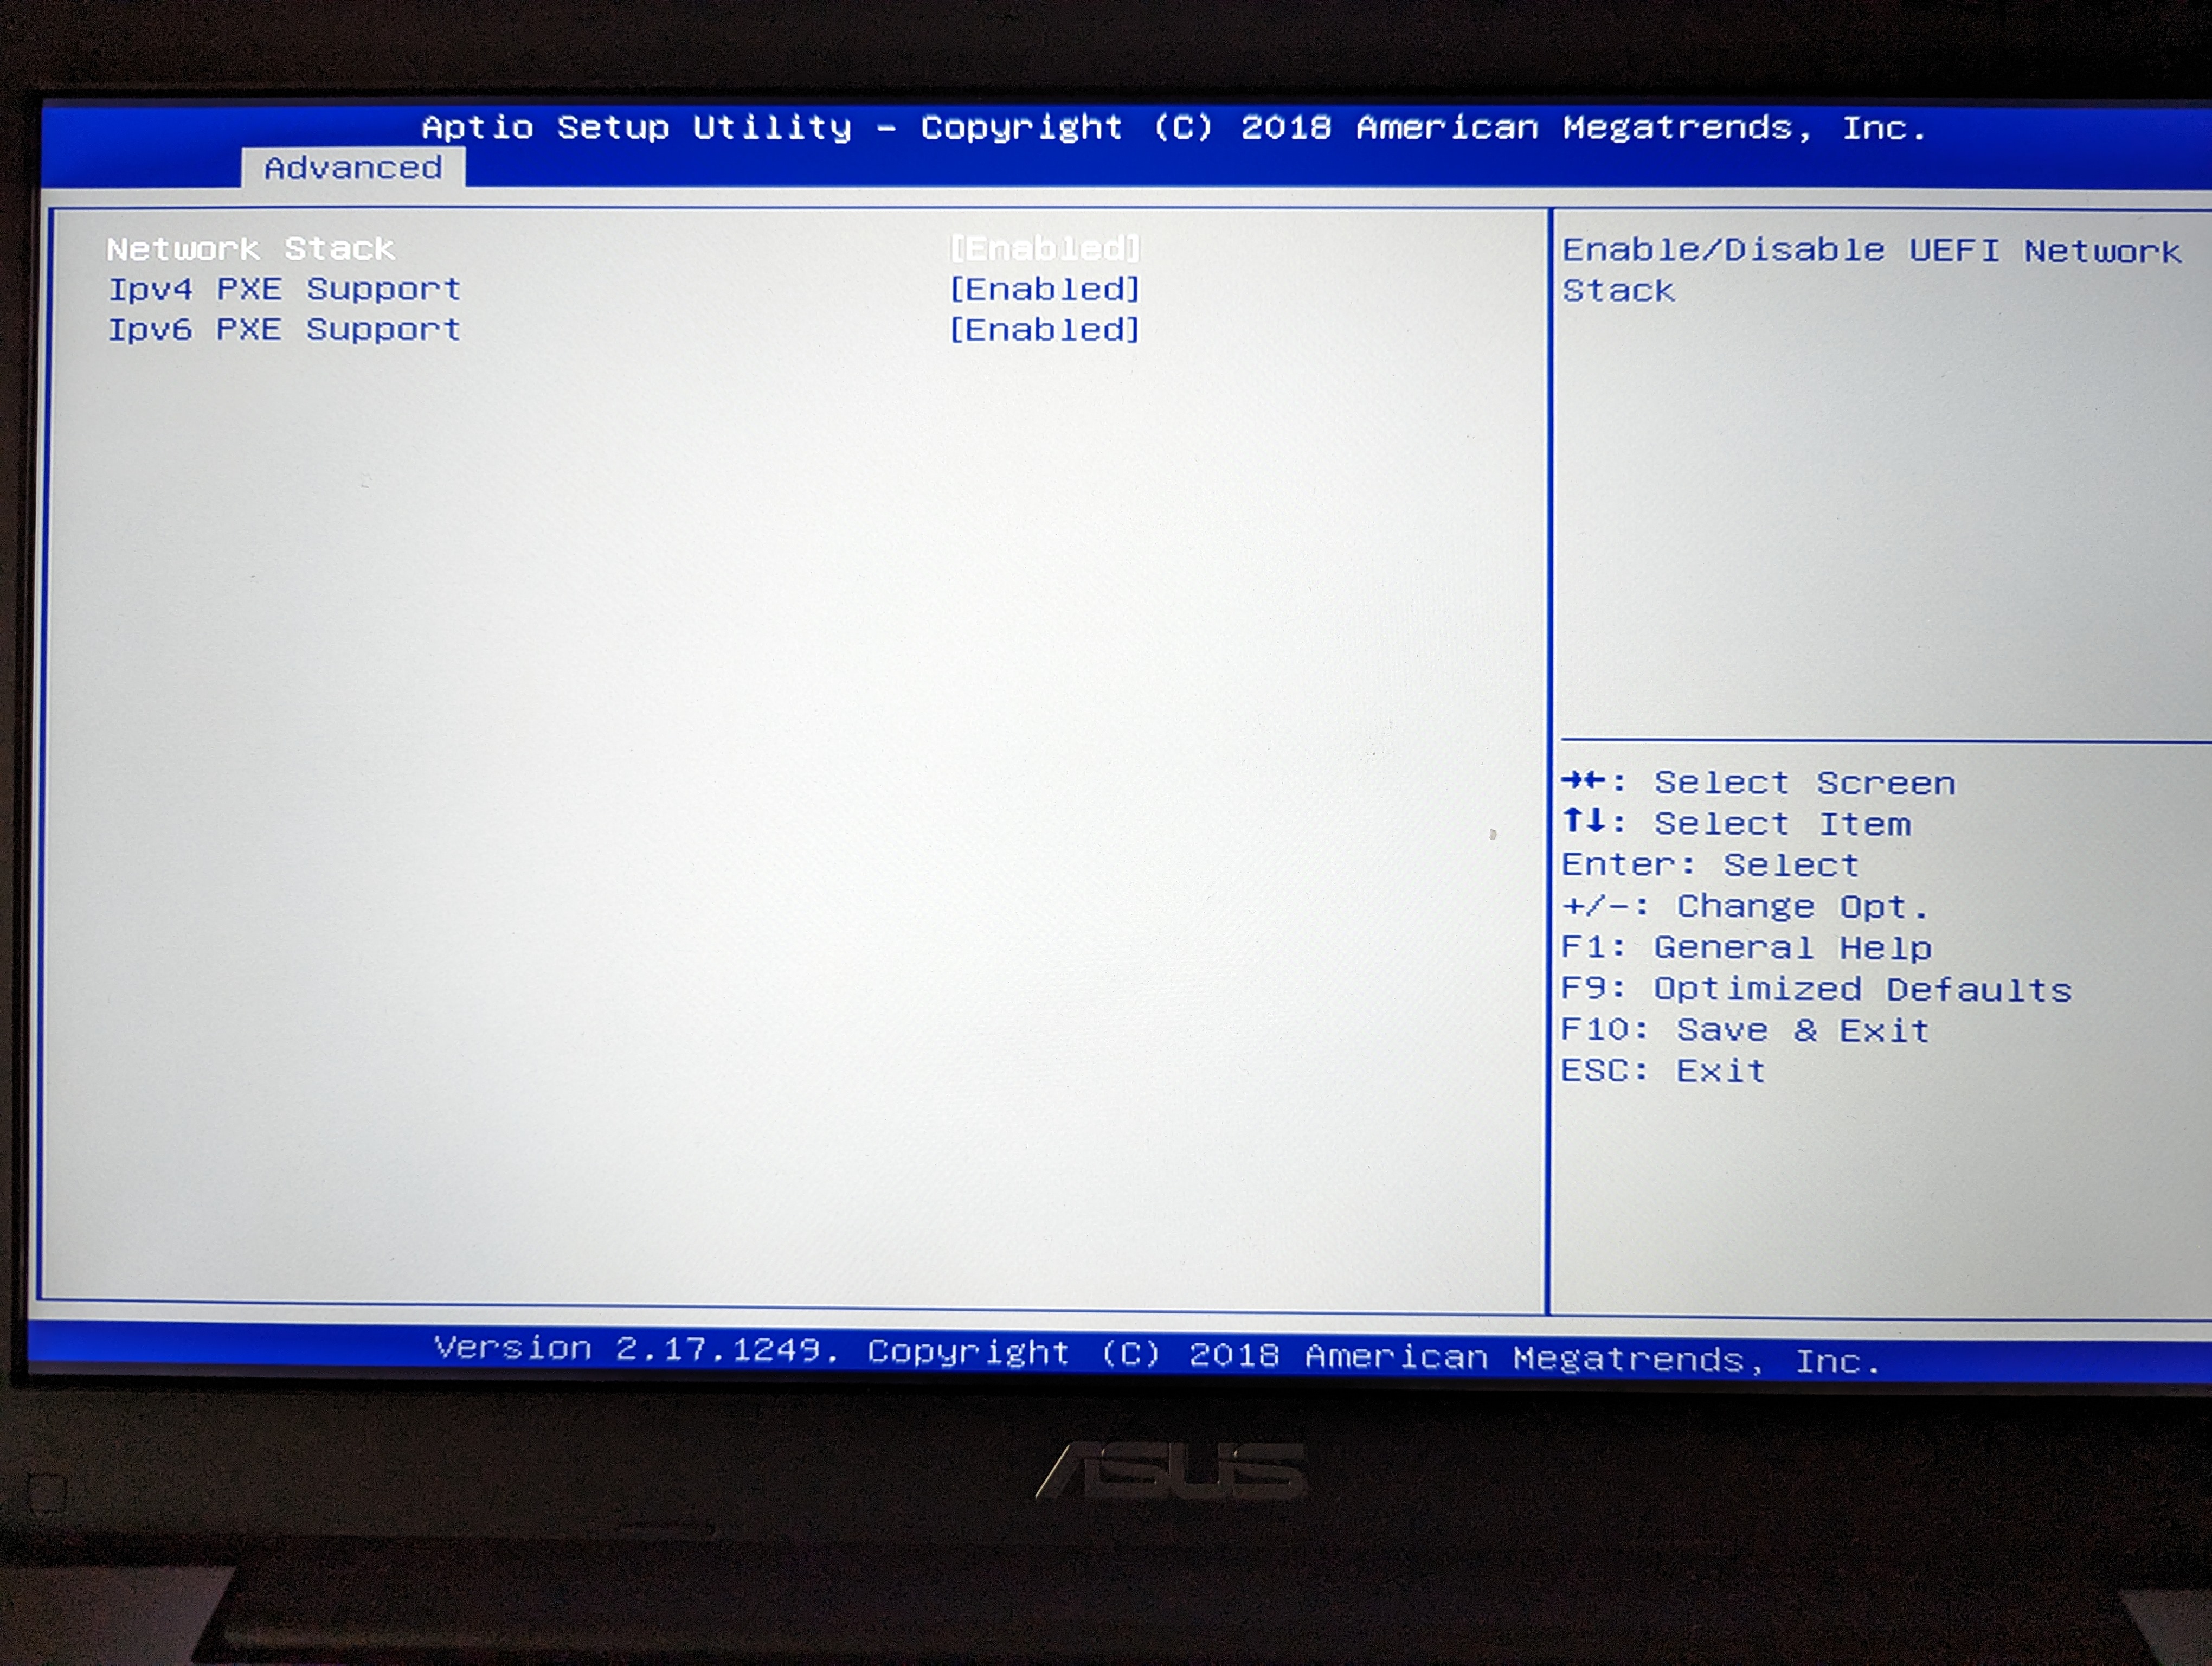
- Enable the Network Stack and the PXE Support accroding to the local network environment
- Save the config and exit
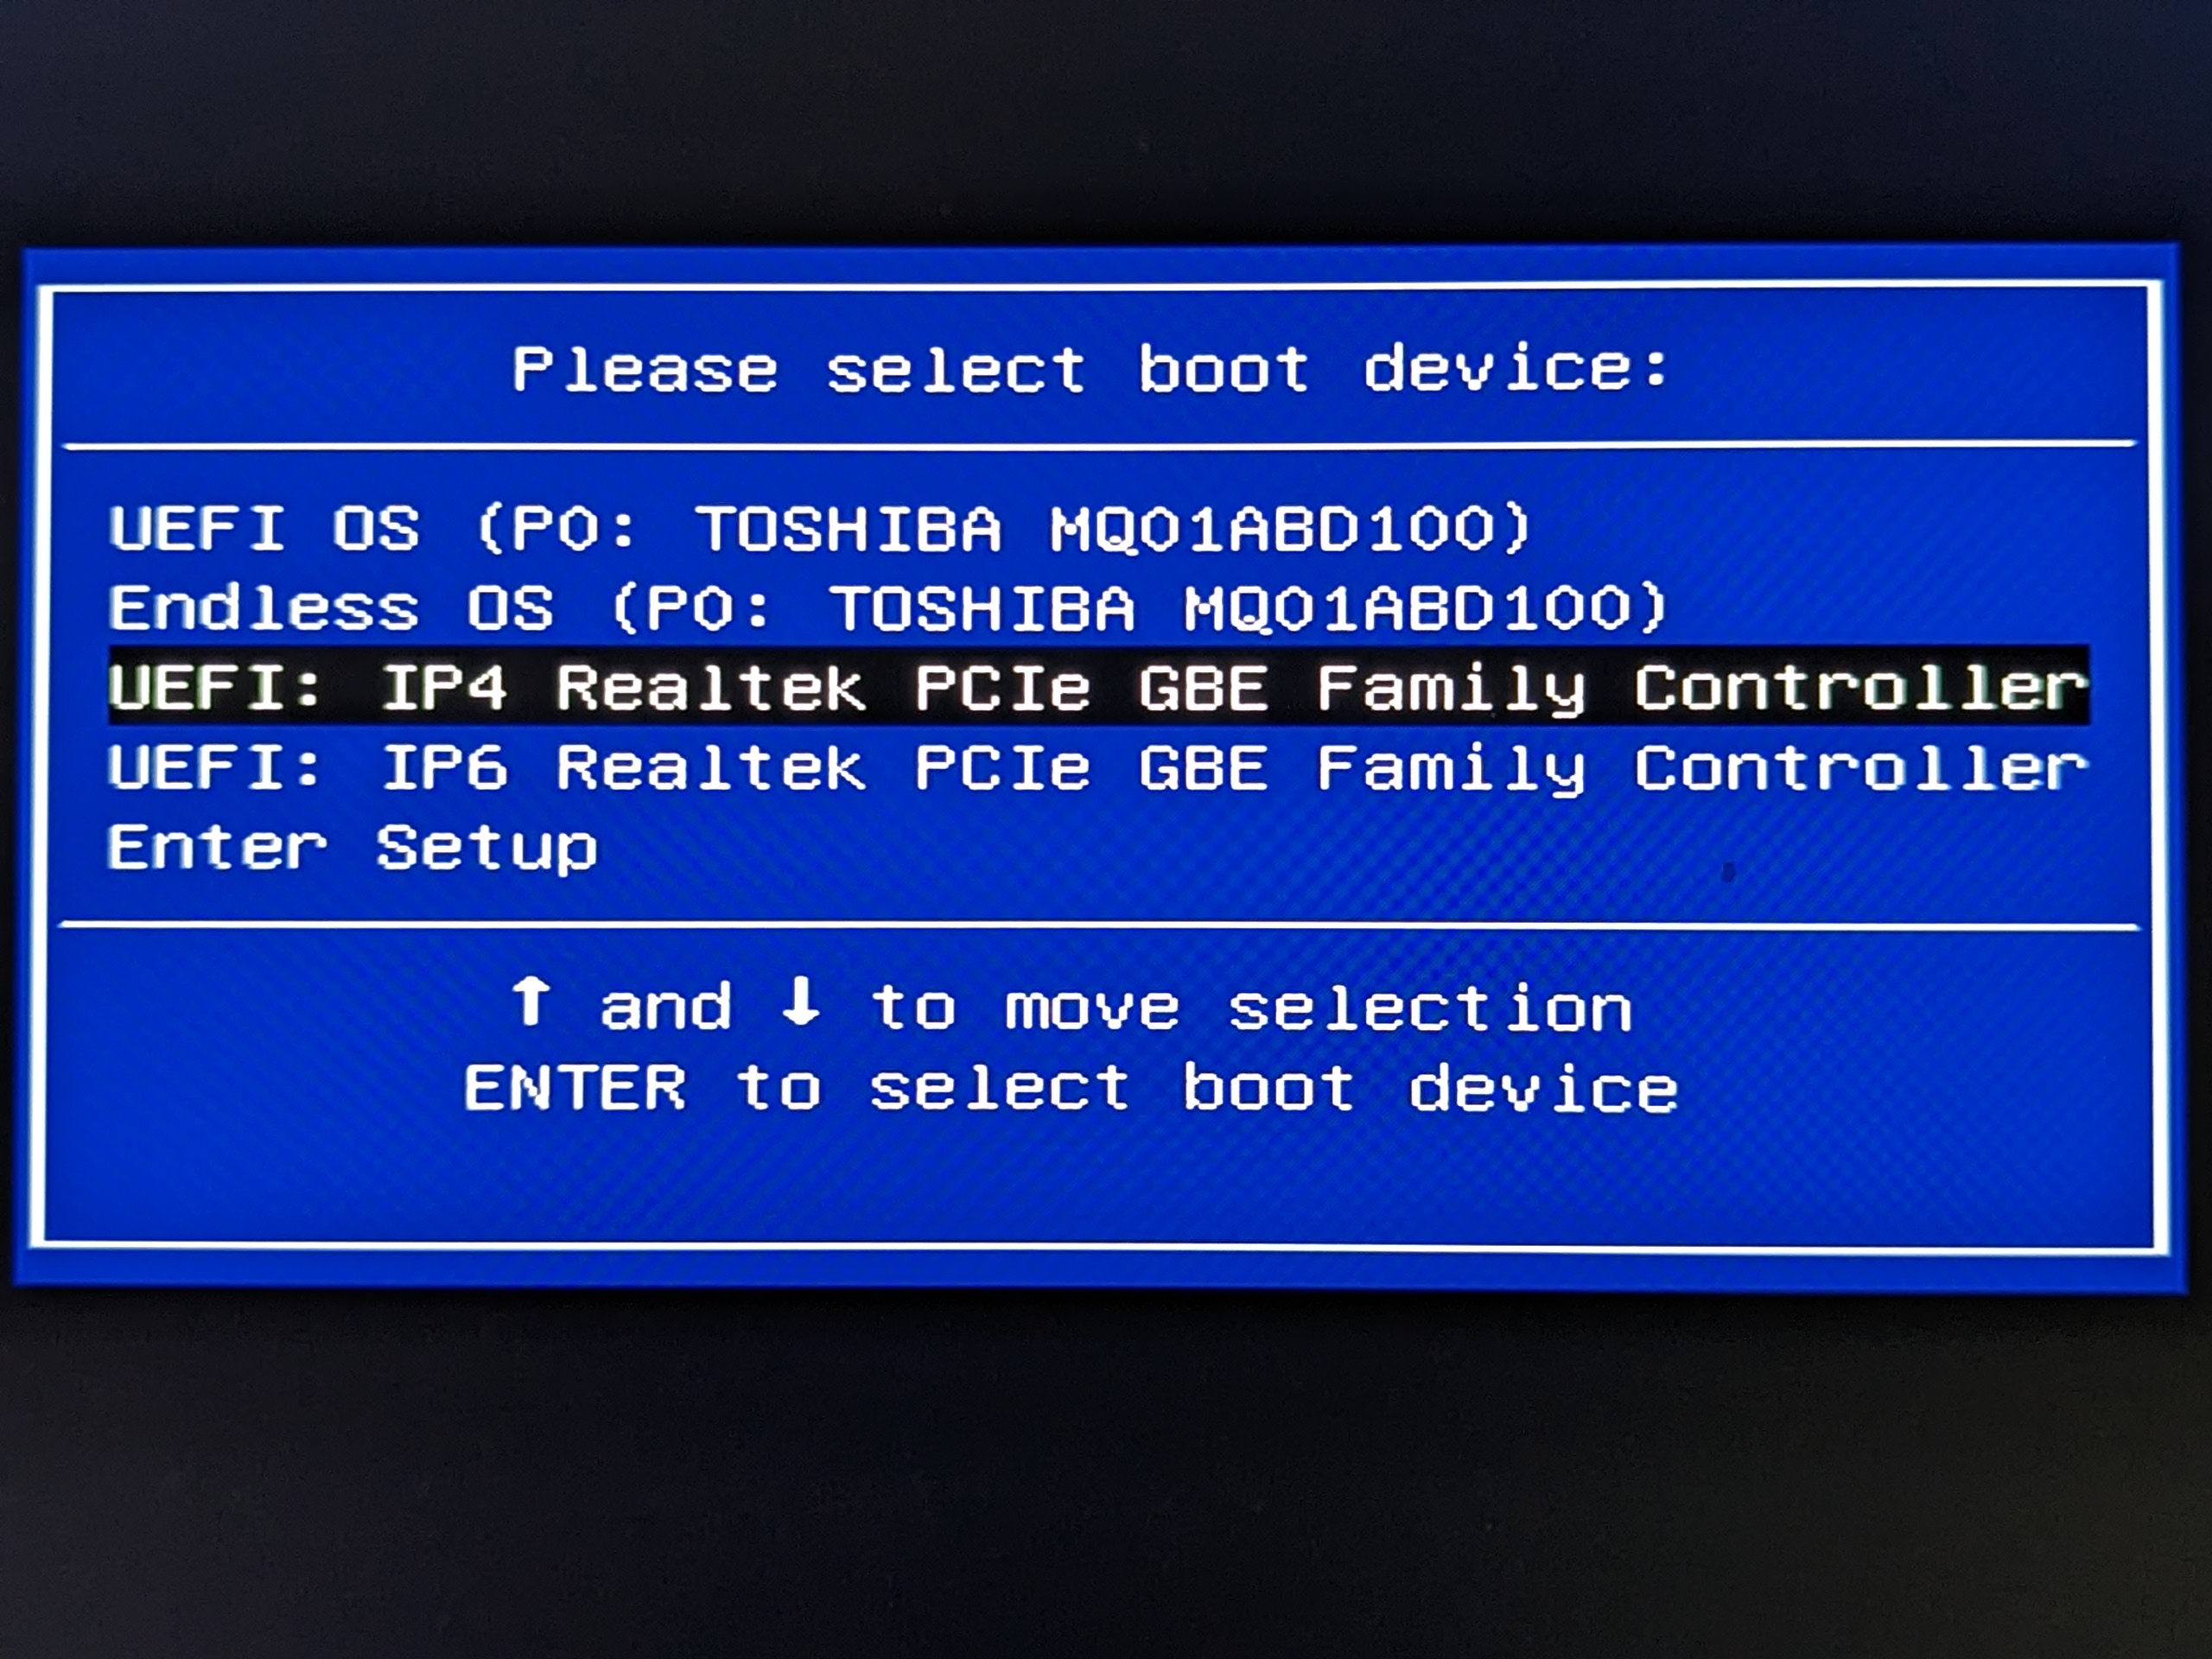
- Reboot and press ESC to show the boot menu. The PXE boot options show up. There are the Ethernet interfaces which support PXE boot. For example, here list IPv4/6 Realtek PCIe GBE Family Controllers
- Get into ASUS machine's BIOS setting -> Network Stack Configuration
¶ Have a Clonezilla server
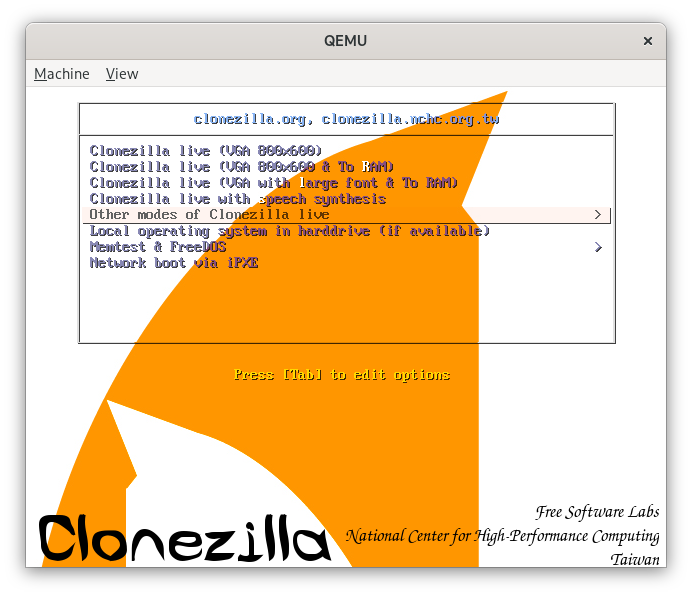
- Boot the server with the LiveCD/LiveUSB. And, Choose the boot option with KMS
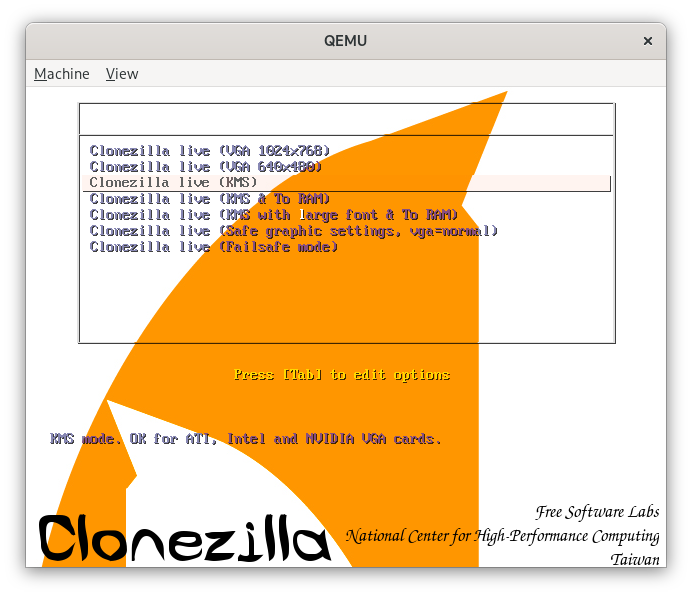
- Choose Language - Choose en_US.UTF8 English for example
- Start Clonezilla
- Choose lite-server to start a Clonezilla server
- Choose start to start the server
- Client boot mechanism - Choose netboot, or both. So that, clients can do PXE boot and the images will come from this Clonezilla server
- DHCP service - According to the network environment. Mine already has a DHCP server. So, choose auto-detect. Then, press y to confirm.
- Mount Clonezilla image directory - Have made a Clonezilla image in the sshfs mentioned in "Make a Clonezilla image from a source machine and save it to a File Server". So, choose ssh_server
- Mount sshfs - IP:
<SSH server IP>, Port:<SSH server listening port>, Account:<user>, Absolute path on the SSH server:/home/<user>/clonezillaimgs - Check sshfs again - OK
- Ask the user's password for ssh - Type the password
- Beginner/Expert mode - Expert mode
- massive-deployment/interactive-client - Choose massive-deployment
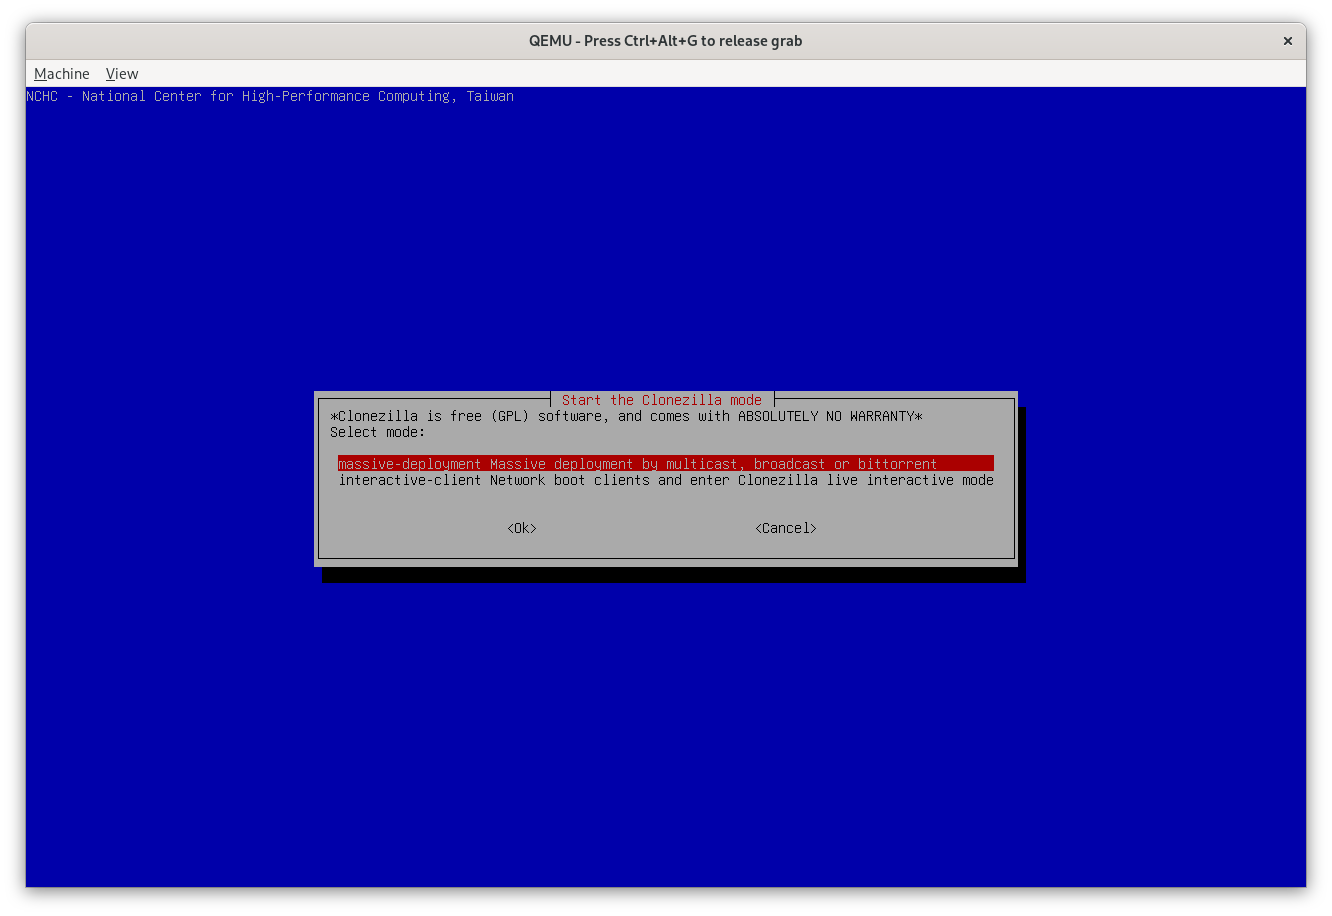
- from-image/from-device - Choose from-image
- restoredisk/restoreparts - Choose restoredisk
- Choose the Clonezilla image generated from "Make a Clonezilla image from a source machine and save it to a File Server"
- Choose the target disk - Choose the target disk for restoring the Clonezilla image
- Clonezilla extra parameters - Deselect -g auto. EOS image has already included the GRUB. Keep other options' default value.
- Create partition tables mode - Choose Use the partition table from the image
- Check the Clonezilla image - Choose sc0 to skip the checking the image before restoring
- Choose the mode to restore client disk - Choose the communication protocol. If the multicast is chosen, the multicast traffic must be allowed on the network devices. And, so others.
- Choose the method for multicast - Choose Clients-to-wait
- How many clients to restore -
1for simple test - Then, Clonezilla starts to prepare the PXE kernel, initrd ... The kernel comes from the one in the LiveCD/LiveUSB.
- The Clonezilla server is ready, becomes a TFTP server and waits requests from Clonezilla clients
¶ Restore the Clonezilla Image to Target Machine
- Boot the target machines with PXE. It will search the TFTP server and fetch the kernel image, initrd and ... Then, execute the Clonezilla and restore the target disk automatically ...
- Wait & wait ...
- Finish and reboot.
- (Optional) Disable the PXE boot and enable the scure boot in BIOS.
The target machine should boot the fresh Endless OS!