Most users should follow the simpler Installation documentation to create an Endless OS USB Stick.
The instructions below are designed for special circumstances sometimes encountered by partner organizations of the Endless OS Foundation, e.g. using custom images.
¶ Using Windows
Using a Windows device to create the reformatter is a graphical process that does not require using the command line.
Important! We recommend review the introduction before getting started.
You can follow along with this video:
¶ Requirements
¶ Hardware
-
A USB flash drive or external hard drive with enough capacity to store your image, plus approximately 4 GB for the live installer system.
For the best speeds, use a USB 3 device connected to a USB 3 port, which can be recognized by having blue connectors or a SS (SuperSpeed) label. We recommend using the fastest drive you can find; for example, read speeds of 300-400 MB/s.
-
A computer running Windows 7 or later with administrator permissions and enough free space to fit the image to be used.
Double-check that you have enough free space to fit the image to be used; some can require 200 GB or more!
¶ Files
-
The Endless Installer for Windows. Direct download: Endless Installer (.exe)
-
The Endless OS image and its signature file. If you don't have your custom image available, please contact our support channels to get a download link.
Two files are required, a larger file with extension:
.img.gzand a smaller file with extension.img.gz.asc. -
The Endless Mass Installer and its signature file. If you don't have these files, please see Endless OS direct download or contact our support channels to get a download link.
Two files are required, a larger file whose name begins with
eosinstaller-and ends with.img.xz, and a smaller file with a similar name ending.img.xz.asc.
¶ Procedure
-
Create a new folder on your Windows computer's internal storage (e.g. on the Desktop), and put all the downloaded files in it: the Endless Installer for Windows, your Endless OS image and signature file, and the Endless Mass Installer and signature file.

The Endless Installer for Windows needs these files to all be in the same folder, and it can reduce errors to ensure there are no other files present.
-
Connect your blank USB drive to an available USB port. If Windows prompts you to repair the drive, allow it to repair it.
-
Double click the
endless-installer.exefile to run the Endless Installer for Windows. Since it needs to be able to see and overwrite your USB drive, it may prompt you for admin rights to run the app; if so, allow it to run. Once running, you should see the following welcome screen: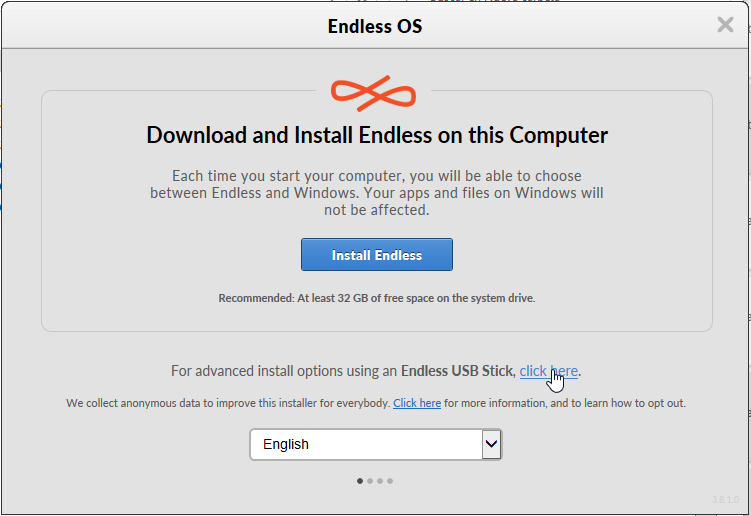
-
For the option to use your own custom image, you must Ctrl-click the advanced options link:
- Locate the label that says “For advanced install options using an Endless USB Stick, click here.”,
- Hold the Ctrl key on your keyboard, and
- Click the click here link.
You must hold the Ctrl key while clicking! Otherwise the Reformatter option will not display.
-
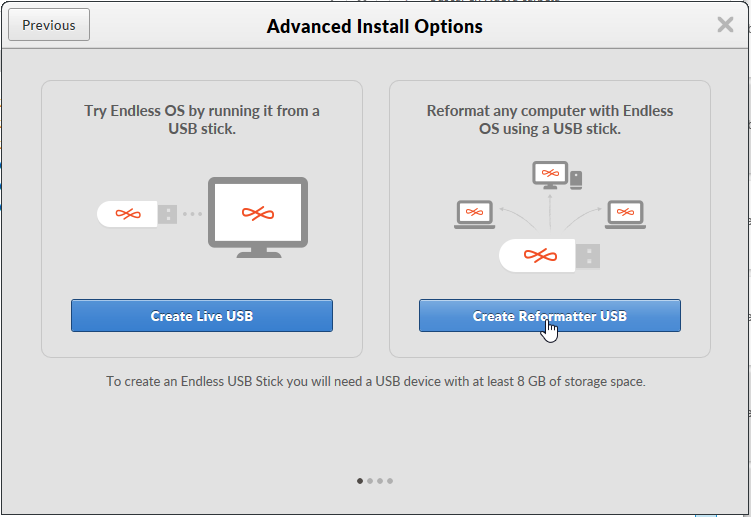
On the Advanced Install Options screen, choose “Create Reformatter USB”.
-
On the Select Your Endless OS Version screen, select your custom image under Use existing image file, then click “Next”.
If your custom image is not shown, ensure the files are all in the same directory as
endless-installer.exe, including the signature files.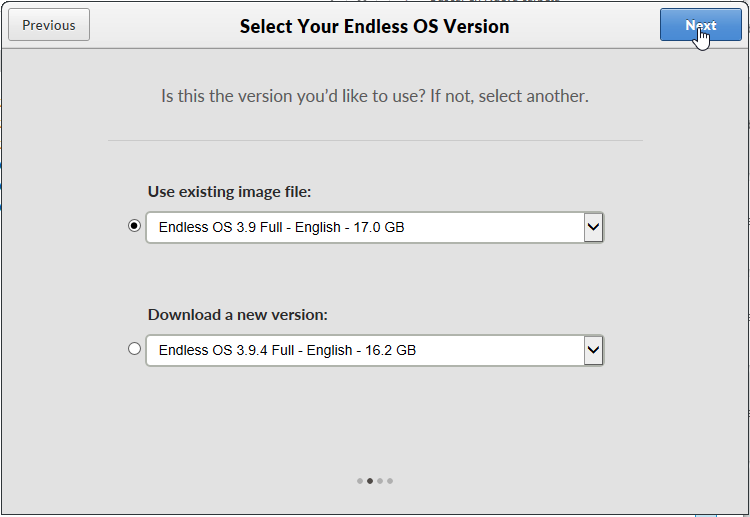
-
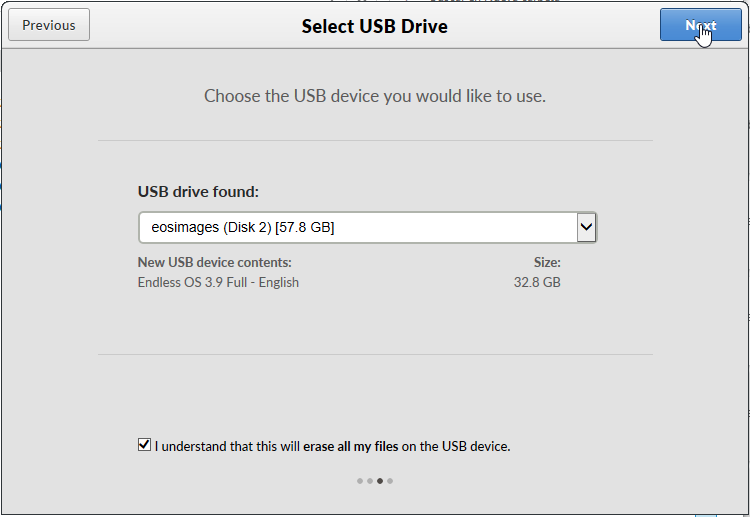
On the Select USB Drive screen, select your previously-inserted USB drive in the drop down menu. You must check the box that states “I understand that this will erase all my files on the USB device”, then click “Next”.
-
The installer will now create the reformatter USB! It will verify your files, then write the changes to the USB drive. This process can take quite a while (e.g. multiple hours) depending on your computer and the size of the image. When finished, it will confirm that your Reformatter USB has been created.
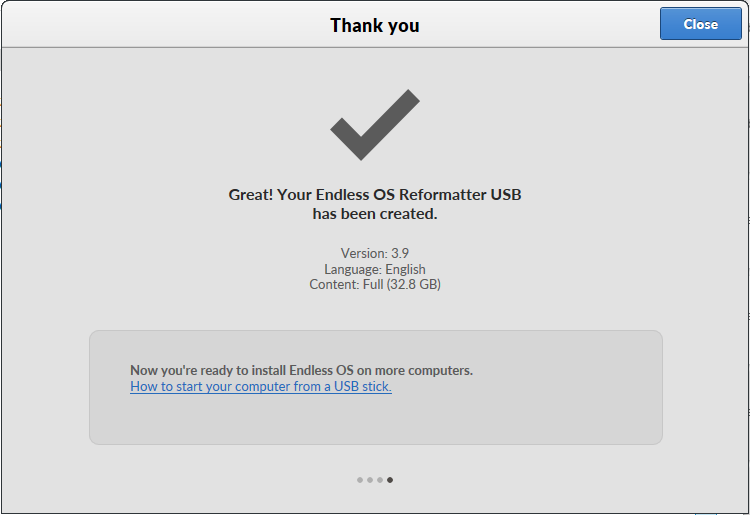
If you get an error instead, a new log file will be created in the same folder as
endless-installer.exe. Please send this file to Endless for support.